
Making a Medieval Wine Label
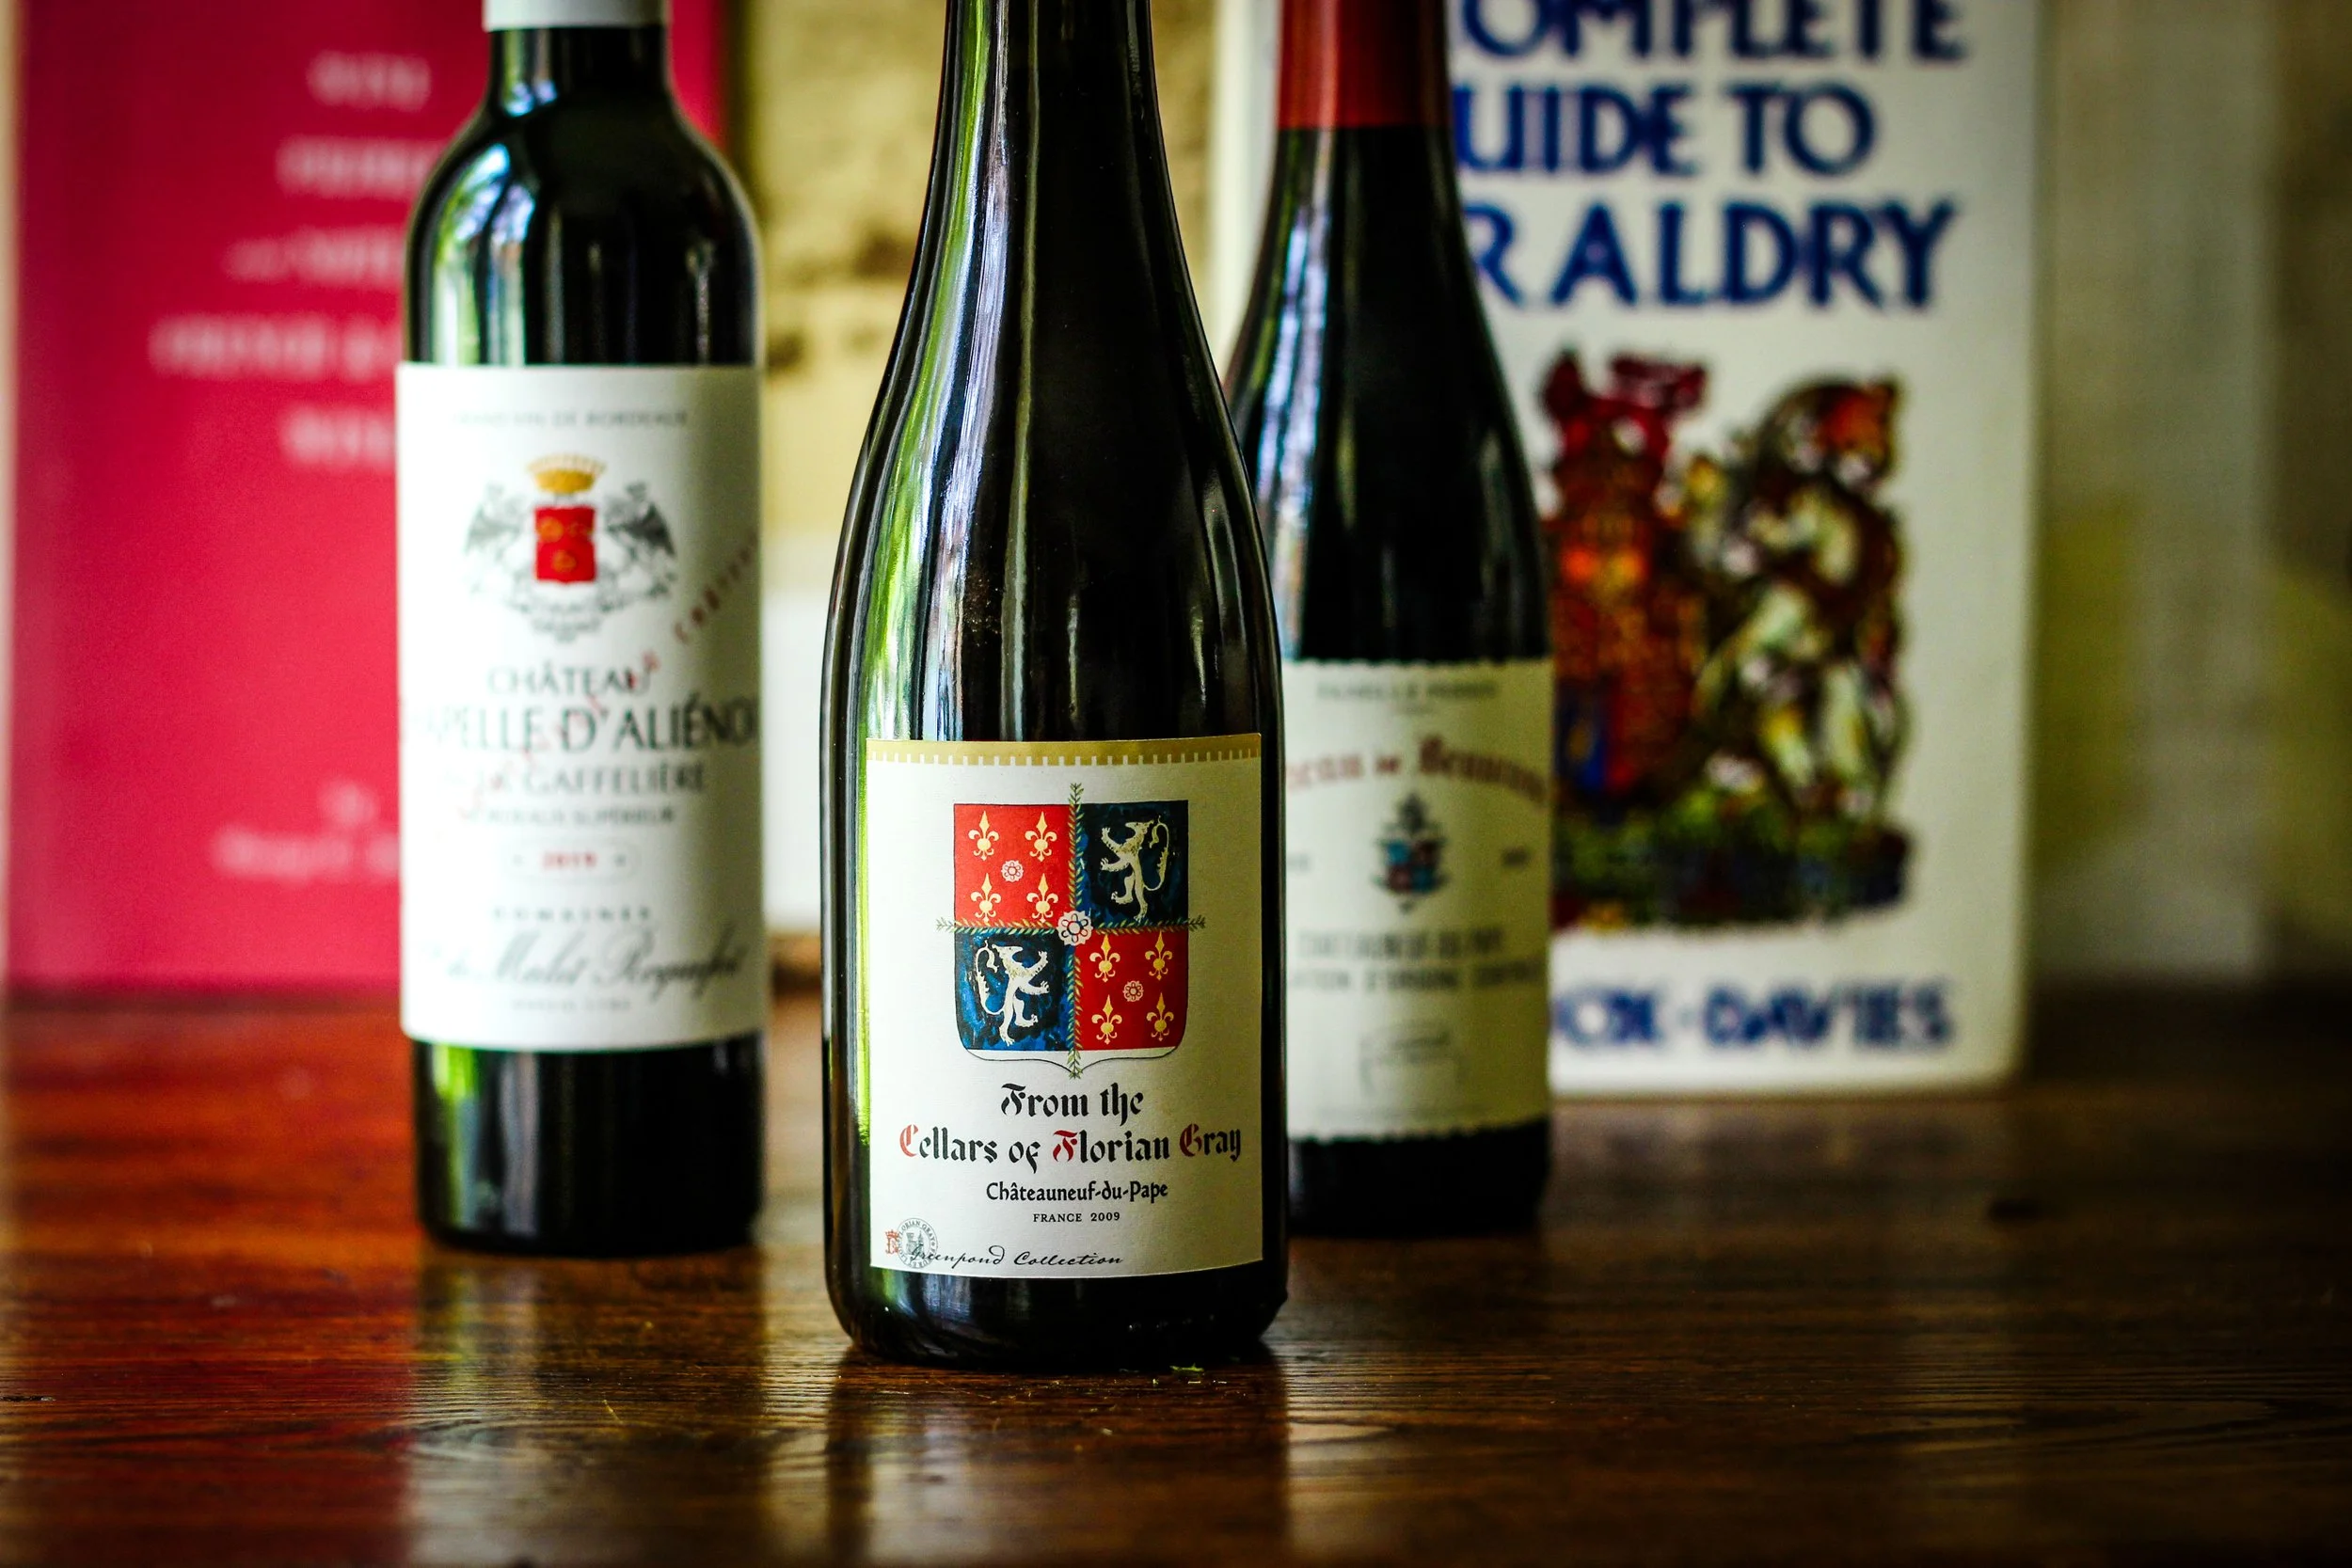
My Diy personalized wine label for Florian Gray.
Making a Medieval label is really no different than making any kind of wine label. The only real difference is the design. When I think of Medieval and wineries that have been around for centuries, I think of the classic coat of arms and lettering in Medieval blackletter - Fraktur, Bastarda, Rotunda etc.
That said, your interpretation of a Middle Ages wine label can be anything you want. I’ll just tell you how I went about designing mine.
In the photo above, I included my label in the forefront and two bottles (and labels) from real wineries in the background.
Château de Beaucastel, to the right, has held their land since the 16th century.
I am very much a wine lover and as someone who used to design personalized wine labels for part of my business, I always notice labels when I’m perusing the wine aisles.
I used these for inspiration when I began thinking about my Florian Gray label.
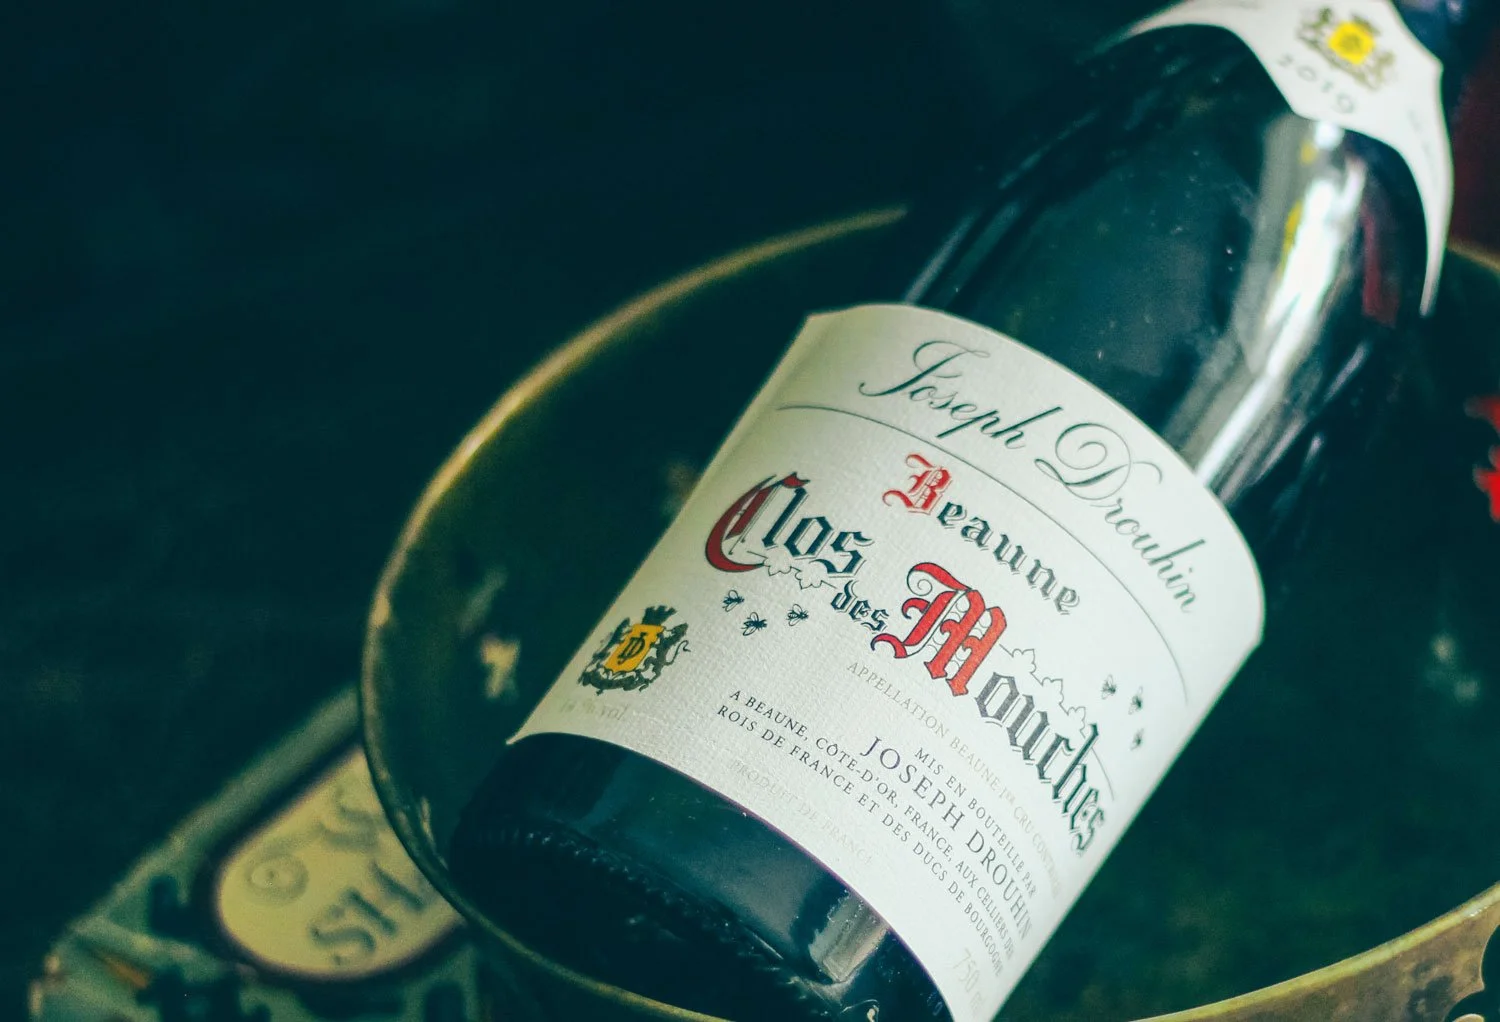
Clos des Mouches from Beaune (Burgundy region, France)
Jospeh Drouhin’s Clos des Mouches is another label I love and took inspiration from. This vineyard was first cultivated by monks in the Middle Ages.
About the design and then the production…
After looking at a number of traditional labels from wineries that have been around for long periods of time, I followed their lead and used a classic medieval font (in this case the fonts are Osgard Stencil and Almost Gothic). I also made the first letters of Cellars, Florian and Gray, all red.
This was common during the medieval era to draw attention to the word, or to show its importance. As you can see, the Close des Mouches label above does just this.
Also taking inspiration from the Clos des Mouches, I put an illustrative icon in the bottom corner. Their icon is actually their coat of arms, mine is the Florian initial ‘F’ which is decorative and serves the same purpose - a visual flourish.
Something that I did not see on a bottle but I have seen on official letters and announcement from the Medieval era is the overlapping of a seal, as if it has been stamped. I liked this and included it with a bit of script text.
But the largest element is, of course, the shield. I designed mine using real Medieval elements - the lion and the fleur de lis are taken from two different painted shields - I used them in multiples instead of singles. I also added my own floral and vine elements, chose the colors and arranged all in the way that I wanted so that my shield would not look like anyone else’s design.
Like I always say, nothing says Medieval like heraldry…and a little crenelation in the form of a line at the top of the label.
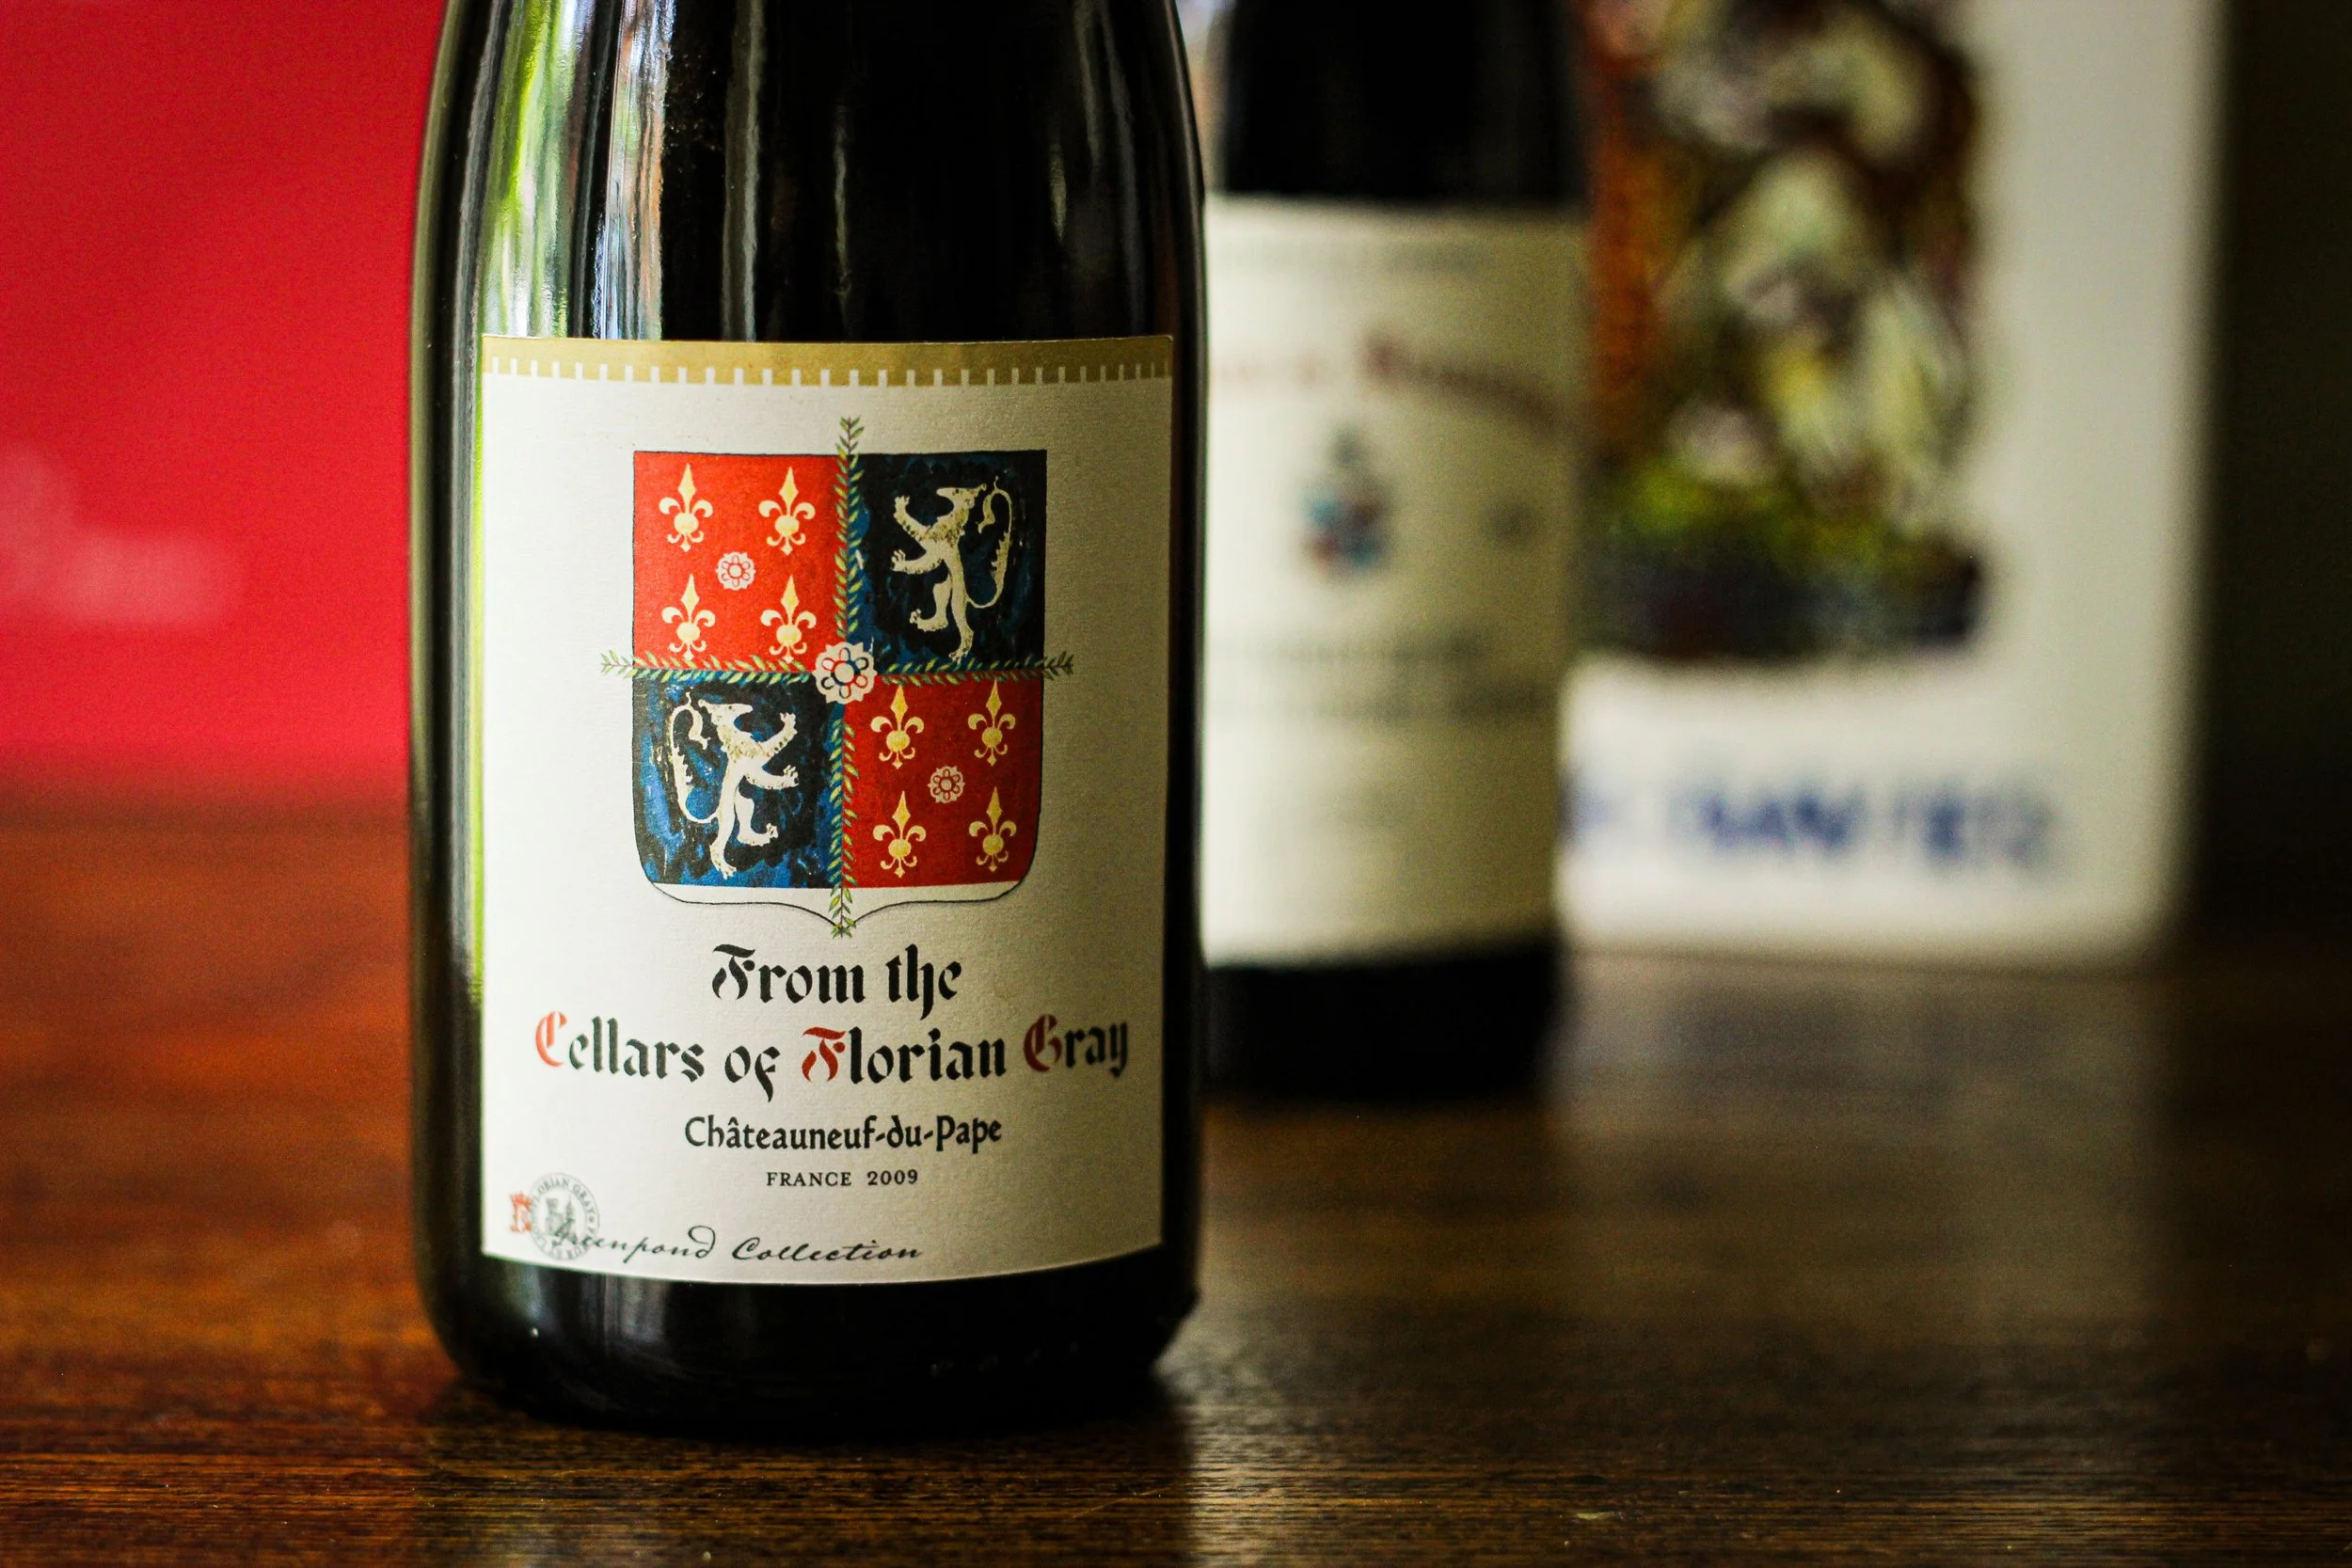
Personalized Medieval Wine Labels…
Text for the label…
You can put whatever you would like for your text.
It might depend upon what occasion you’ll be using these for. If it’s just for your own cellar, like mine, you can use ‘From the Cellar or Cellars of.’ If it’s for a wedding, maybe the names of the bride and groom, if it’s for a Ren Faire type party, make a logo for your faire and add that.
I would also add the type or varietal of wine, so people know what they’re drinking. I have another note about the original maker - if it’s not you - below, you’ll read it when you get to the part about removing a label.
I also like to add the vintage year.
Okay, now on to producing the labels.
Steps to creating your DIY Medieval Wine Label…
Procure your wine bottles and label or paper stock
Decided on a label size that will work with your bottles
Create your design.
Print your design
Remove an existing label if need be
Adhere your label
First the bottle, then the size…
After getting your bottles, the first thing to do when creating your label is decide what size you want it to be.
This is very important because it needs to fit on whatever bottle you have chosen - and in order to lay completely flat without puckering at the top, it has to be adhered to the portion of the bottom before the bottle starts to thin and taper.
So, decide your size. I used a size of 3.5” w x 4” h.
I also printed a smaller version at 2-3/4” w x 3-1/8h (just reduce your original label).
The smaller label is for a 375ml bottle, or a half bottle - and that’s what I’ve shown in the photos of my labels.
If you are using an existing bottle of wine…
Unless you make your own wine, you may be buying existing wine and covering the label or taking the original label off. Usually this is the case when you’re going to be using your personalized labels on bottles for a party or wedding. This is not for when you are selling wine.
As an example, I did this, I removed the label from an existing wine bottle. If I were to do this over again, I would still put From the Cellars of Florian Gray, but I would also include the actual winery with the wine varietal or type (for example, Château de Beaucastel above Châteauneuf-du-Pape) this way, you’re marking it from your cellar but not calling it your wine. And of course, you should not be selling someone else’s wine under your label.
If, however, you do make your own wine, then you’ll be buying brand new bottles, which is simpler.
In this case, you’ll not need to take off any existing labels or cover them, you’ll simply determine the size of your label and move on.
A Note about removing or covering wine labels…
For personal use, if you want to remove an existing wine label you usually need to use hot water to release the adhesive beneath. Be sure it’s not too hot though, heat will age your wine faster and cause it to lose freshness.
When I remove a label, I use warm water, dish soap and let it soak briefly and then remove. If there is stubborn gook, use something like Goo Gone to remove completely.
If you decide you want to go the simpler route of just covering an existing label with your own - then make sure the label you design is slightly larger than the original one. One drawback to this is that if you are using inkjet labels, the paper stock for these is sometimes not completely opaque and you may be able to see the original label coming through slightly.
Anyway, for this reason, if you are covering a label, I would suggest looking for bottles that have simple labels, will lots of white space.
I believe there is a label stock called ‘black out,’ if you can find it - it’s very opaque.
Water-resistant, water proof…
Water-resistant does not mean waterproof.
That said, if you use a glossy stock of good quality, even if it’s not water-resistant, they will usually do okay if they get slightly damp. If you need them to be absolutely waterproof, look for self-adhesive label stock that has that ability.
Btw, if you live in a really, really warm area and you’re planning on chilling your wine in the fridge, you might want to consider waterproof labels - because your bottles will probably start to ‘sweat’ once they go from cold to hot.
Pre-Made self-adhesive labels…
You can absolutely design for pre-made blank labels.
The one thing I don’t really like about those though, is that they usually have rounded corners which makes them look more like an office product - that’s my opinion, but I can’t deny the ease. You do need to make sure they print correctly, centered etc.
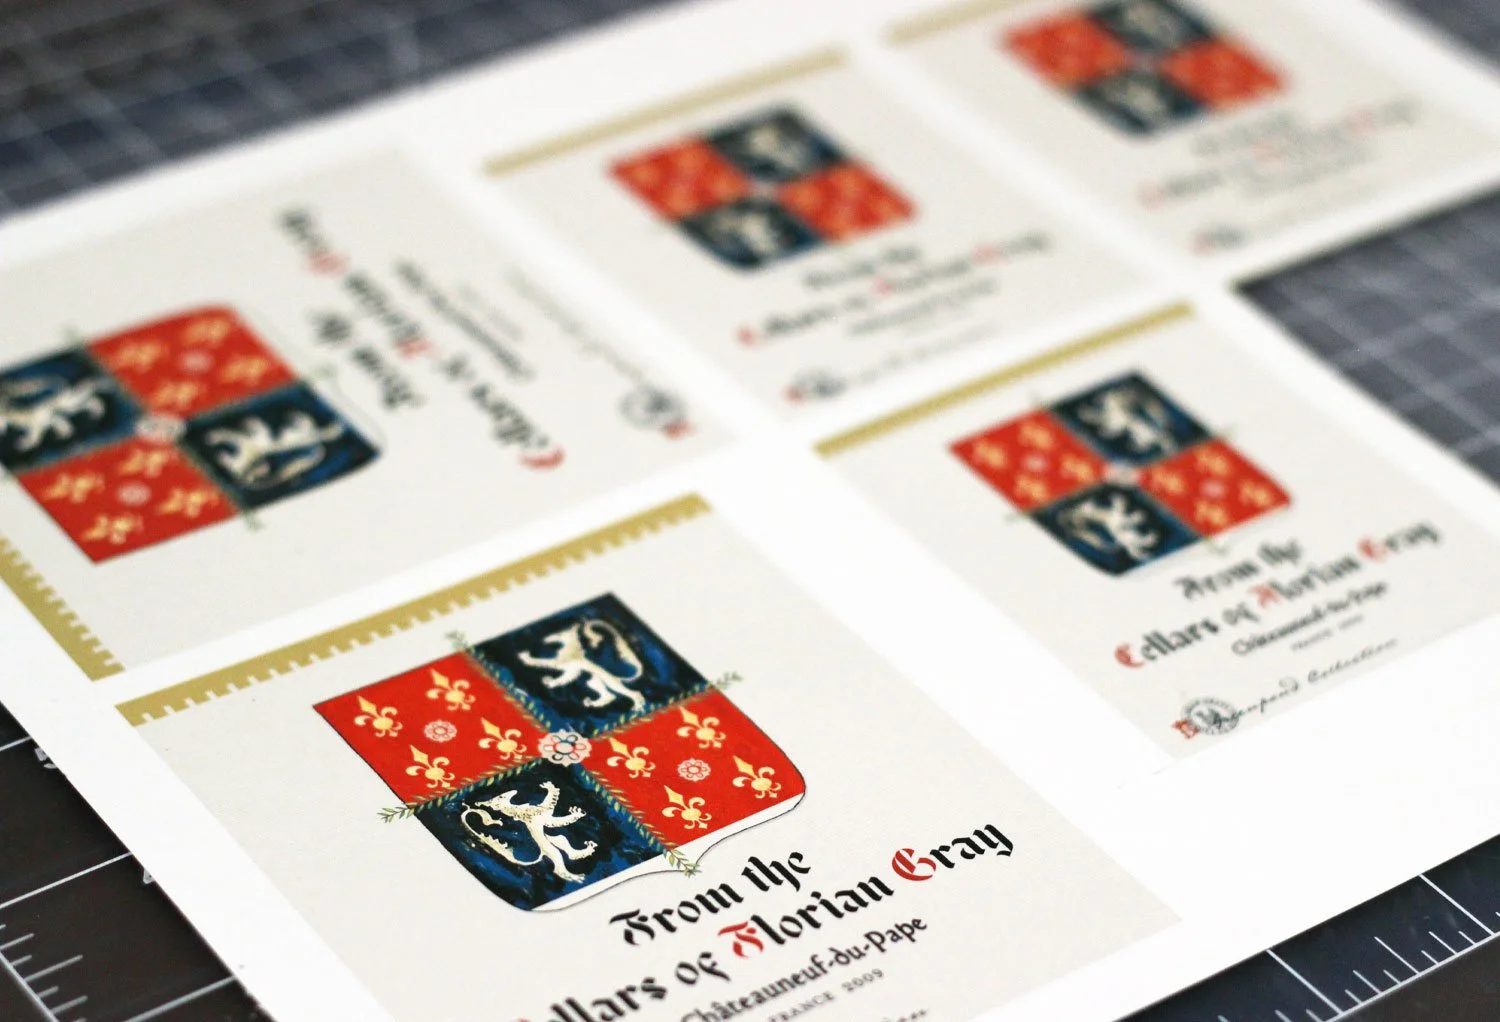
8.5×11 self-adhesive label sheet with both sizes.
Printing on 8.5×11 self-adhesive sheets…
I prefer to print on full 8.5×11 sheets of self-adhesive paper and cut out my labels.
This gives me much more leeway in terms of size and they are always centered correctly.
This is because I design my labels in photoshop. So, for example, the way I set-up my labels to print, was to bring my final label designs (two sizes - 3.5” w x 4” h and 2-3/4” w x 3-1/8 h) and place them on a new document that was 8.5×11.
NOTE: I put a hairline border stroke around labels if color doesn’t go to the edge and create a natural border, this way after they’re printed, you can cut just inside the line and not have to worry about your printer being slightly off.
However, my labels did have color throughout so I did not print a cut line.
Printing…
I use a Canon printer with canon inkjet ink. It’s what I have used for the last 12 years, but you can use whatever printer you would like.
Or, you can go the old school way and make a design and using a copier, copy it onto sticker paper.
And, of course, you don’t have to use sticker paper though you do have to adhere it somehow so it’s either that or double-stick tape. Actual glass glue would work too, I imagine, though I’ve never tried it.
My Canon ink is pretty water resistant which I like. I use the Pixma series.
If you don’t want to print at all, you can draw or paint your label and each one will be unique. I like the idea of this if it’s for your cellar or a smallish party where you don’t have to produce too many.
Placing your labels on the bottles…
Assuming your bottles are clean and dry and your labels are cut out and ready to go, you can now adhere your stcikers to the bottles.
I like to lay the bottle flat on a bunched-up kitchen towel so it won’t roll.
FIRST - lay your label with the backing still on against your bottle. Find the spot before the bottle tapers - the whole label must be below the taper. Then continue…
Remove the backing from the label and holding the stickers by 2 opposing diagonal corners, hover the label over the bottle and carefully place the vertical center down. Holding by the corners will let you tweak your placement until the last second. One you have the center down, smooth, going outward and slowly so you don’t get bubbles or creases.
And then - you’re done - enjoy!
Be sure to store your wine in a cool, dark area, not above your refrigerator where it will get warm:)